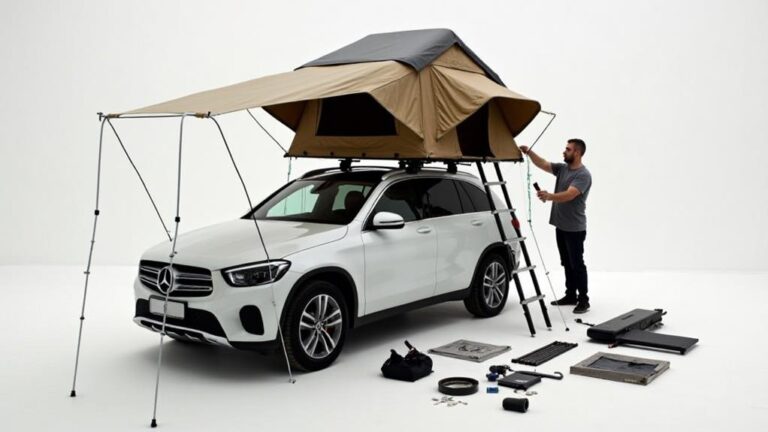
You've decided it's time to remove your roof top tent from your car, but you're not sure where to start. Before you begin, make sure you have all the necessary equipment and inspect your roof rack's condition to avoid any damage or complications. It's crucial to follow the correct steps to ensure a smooth removal process. You'll need to release the locking mechanism, disconnect the electrical system, and undo various straps and clips. But what's the best way to do this without scratching your car or damaging the tent? Let's break down the process step-by-step.
Key Takeaways
- Remove all camping accessories and ensure the roof rack is in good condition before attempting to remove the tent.
- Release the locking mechanism and remove screws or bolts for fixed brackets, and loosen the clamp for clamping brackets.
- Disconnect the electrical system by releasing the power cable, removing the fuse, and disconnecting the battery connection.
- Undo the straps and clips securing the tent fabric to the frame, and release the tension on the crossbar clamps.
- Loosen the clamping system securing the tent to the vehicle's roof rack and lift the tent straight up, using legs rather than back.
Prepare Your Equipment
Before you begin the process of removing a roof top tent, gather the necessary equipment to ensure a safe and efficient removal.
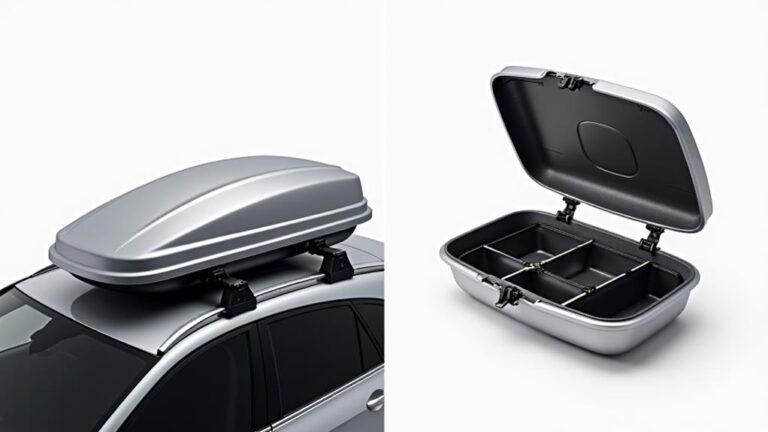
You'll need a socket wrench or spanner, a ladder or step stool, and a set of spare bolts or screws in case any are damaged or lost. Make sure your roof rack is in good condition, with no signs of damage or wear, as a compromised rack can put you and others at risk.
Check that all camping accessories, such as lights, antennas, or storage boxes, are removed or secured to prevent damage or loss during the removal process.
It's also essential to inspect your roof rack's maintenance history to ensure it's been properly cleaned and serviced. Verify that all bolts and screws are tightened to the manufacturer's recommended torque specification.
Additionally, ensure you have a suitable location to store the tent once removed, such as a dry, flat surface or a storage bag specifically designed for roof top tents.
Having all the necessary equipment and a clear workspace will make the removal process smoother and safer.
Release the Locking Mechanism
With the roof rack and surrounding area prepared, you're ready to engage the locking mechanism release. This step is crucial for tent security, as it ensures the roof top tent is safely detached from your car.
The locking mechanism release process may vary depending on your specific roof top tent model. Refer to your user manual for specific instructions. Typically, you'll need to locate the release lever or button, usually located on the tent's mounting bracket or near the roof rack.
| Locking Mechanism Type | Release Method | Tent Security Level |
|---|---|---|
| Lever-based | Pull or push the lever to release | High |
| Button-based | Press the button to release | Medium |
| Pin-based | Remove the pin to release | Low |
When releasing the locking mechanism, ensure you're applying the correct amount of force to avoid damaging the mechanism or the roof rack. It's also essential to keep your body positioned safely away from the tent to avoid injury in case it suddenly releases. With the locking mechanism released, you're now ready to proceed with the removal process.
Remove the Mounting Brackets
You'll typically have 2-4 mounting brackets securing your roof top tent to the roof rack, which must be removed to detach the tent.
These brackets come in various types, including fixed, adjustable, and clamping brackets. Identify the type of brackets you have and locate the release mechanisms.
For fixed brackets, you'll typically need to remove screws or bolts using a wrench or socket.
Adjustable brackets often have levers or clips that need to be released.
Clamping brackets may require you to loosen the clamp using a wrench or Allen key.
Before removing the brackets, ensure you have a clear understanding of their release mechanism to avoid damaging the roof rack or the tent.
Regular bracket maintenance can help prevent corrosion and wear.
Inspect the brackets for any signs of damage or corrosion and clean them before storing the tent.
Remove any remaining screws or bolts, and store the brackets in a dry place.
With the mounting brackets removed, you can now proceed with detaching the roof top tent from the roof rack.
Disconnect the Power Source
After removing the mounting brackets, your focus shifts to disconnecting the power source that connects your roof top tent to the vehicle's electrical system. This step is crucial to avoid a power outage or battery drain when removing the tent.
| Component | Location | Action |
|---|---|---|
| Power cable | Near the tent's electrical panel | Locate and identify the power cable |
| Electrical connector | Attached to the vehicle's electrical system | Release the electrical connector from the vehicle's system |
| Fuse or circuit breaker | In the tent's electrical panel | Check and remove the fuse or reset the circuit breaker |
| Battery connection | Connected to the vehicle's battery | Disconnect the battery connection to prevent power supply |
| Electrical system test | Using a multimeter or test light | Verify that the electrical system is deactivated |
To disconnect the power source, follow the steps outlined in the table above. Start by locating the power cable and electrical connector. Release the electrical connector from the vehicle's system and check the fuse or circuit breaker. Disconnect the battery connection to prevent power supply. Finally, use a multimeter or test light to verify that the electrical system is deactivated.
Release the Tent Fabric
Release the tent fabric by undoing the straps and clips that secure it to the roof top tent's frame. These straps and clips can be found along the edges of the tent and are designed to keep the fabric tight and secure.
Be careful not to damage the fabric or the frame as you release the straps, as this can be costly to repair.
When undoing the straps, start at one edge of the tent and work your way around the perimeter. Make sure to release all of the straps and clips before attempting to remove the tent fabric from the frame.
This will ensure that the fabric is completely free from the frame and can be easily removed.
Proper fabric care and regular tent maintenance can help extend the life of your roof top tent.
As you release the tent fabric, inspect it for any damage or wear. Make a note of any repairs that need to be made before storing the tent.
Remove the Crossbars
You'll now focus on removing the crossbars, starting with the clamps that secure them to the roof rack.
Begin by releasing the tension on the crossbar clamps, then loosen the bolts that hold them in place.
Next, you'll remove the crossbar clamps and then the crossbar bolts to free the crossbars from the roof rack.
Removing Crossbar Clamps
With your roof top tent's mounting hardware exposed, it's time to tackle the crossbar clamps.
These clamps are designed to keep your rooftop tent securely attached to the crossbars, but now they're in the way of removing the crossbars.
To begin, locate the clamp designs that hold the crossbars in place. Depending on the manufacturer and model, these clamps may vary in design and functionality.
For instance, some clamp designs may have a lever or a screw that needs to be released.
For Rooftop Adventures enthusiasts, it's essential to familiarize yourself with the specific clamp design used on your vehicle.
Identify the type of clamp and the mechanism that secures it to the crossbar. Take note of any screws, levers, or bolts that need to be removed or released.
Remove any screws or clips that hold the clamp in place. Gently pull the clamp away from the crossbar, taking care not to damage the crossbar or the clamp itself.
With the clamp removed, you're one step closer to removing the crossbars and ultimately, your rooftop tent.
Loosening Crossbar Bolts
Now that the crossbar clamps are removed, your focus shifts to the crossbar bolts that secure the crossbars to the vehicle's roof rack.
These bolts are critical to the stability of your roof top tent, and proper tent maintenance requires regular inspection for signs of bolt rusting or damage.
- Inspect the crossbar bolts for signs of rust or corrosion
- Apply a rust-inhibiting lubricant to the bolts to facilitate removal
- Use a wrench or socket to loosen the bolts in a star pattern to avoid stripping the threads
- If the bolts are stubborn, consider using a breaker bar or impact wrench to loosen them
Loosen the crossbar bolts in a star pattern, working your way around the rack to maintain even tension.
Be cautious not to strip the threads or damage the rack.
If you encounter any rust or corrosion, take a moment to clean the area and apply a rust-inhibiting lubricant to prevent future issues.
With the crossbar bolts loosened, you're one step closer to removing the crossbars and ultimately, the roof top tent.
Loosen the Clamping System
The clamping system securing the roof top tent to the vehicle's roof rack must be loosened before any further disassembly.
This critical step is often overlooked, but it's essential for safe and efficient tent removal. As you loosen the clamping system, be mindful of the clamping techniques used during initial installation, as these will inform your removal approach.
Begin by locating the clamping system's adjustment mechanism, typically a lever, knob, or bolt.
Loosen the mechanism by turning it counterclockwise or sliding the lever to the open position. Be cautious not to remove any bolts or screws at this stage, as this can compromise the tent's structural integrity.
As you loosen the clamping system, inspect the clamps and associated components for signs of wear or damage.
This is an excellent opportunity to perform routine tent maintenance, such as cleaning and lubricating moving parts. Keep track of any damaged or worn components, as these may need to be replaced during reinstallation.
With the clamping system loosened, you're now ready to proceed with the next step in the removal process.
Lift the Tent Off
You're now ready to lift the roof top tent off your vehicle, but before you do, consider a few key factors to ensure a safe and successful removal.
Assess the clearance around your vehicle to prevent damage to the tent, the vehicle, or nearby objects.
As you prepare to lift the frame, make sure you have a secure grip and a clear path to remove the tent.
Tent Removal Tips
Your rooftop tent's mounting hardware is the key to safe removal. Before you start lifting, ensure all clamps, latches, and bolts are fully released. This will prevent any accidental reattachment or damage to your vehicle's roof rack during the removal process.
When it comes to lifting the tent off your vehicle, it's crucial to follow proper techniques to avoid injury and damage.
Consider the following tent removal tips:
- Keep the tent's center of gravity over your vehicle to minimize the risk of the tent tipping over.
- Lift the tent straight up, using your legs rather than your back, to maintain control and stability.
- If possible, have a second person assist you in lifting the tent to share the weight and workload.
- Inspect your vehicle's roof rack and the tent's mounting hardware after removal to ensure no damage occurred during the process.
Regular tent maintenance is essential for camping enthusiasts, as it ensures your rooftop tent remains in good condition and functions as intended.
Assessing the Clearance
Precision is key when lifting the tent off your vehicle.
To avoid clearance issues, inspect the surrounding area and ensure you have enough space to lift the tent off your car. Check for roof obstacles such as aerials, antenna, and roof racks, as they can interfere with the tent's removal.
Verify that the area is clear of any overhead obstructions, like branches or power lines, to prevent damage or injury.
Measure the clearance between the tent and any nearby objects to ensure a safe and obstacle-free removal.
Take note of the tent's size and shape, as well as any additional features like luggage carriers or bike racks. Consider the weight and balance of the tent, as uneven weight distribution can make it more difficult to lift.
Double-check that the vehicle is parked on a level surface and that the tent is securely attached to the roof rack.
This will help prevent the tent from shifting or falling during removal. By assessing the clearance, you'll be able to plan a safe and efficient removal process.
Lifting the Frame
Before lifting the frame, ensure all connections between the tent and the roof rack are released. This includes any clamps, brackets, or straps that secure the tent to the vehicle.
Verify that the ladder and any other accessories are also detached.
Now, it's time to lift the frame off the roof rack.
The frame design of your roof top tent will influence the lifting techniques you'll use.
Consider the weight and size of the tent, as well as any built-in lifting aids such as handles or grips.
Some key considerations when lifting the frame include:
- Positioning yourself for optimal leverage and balance
- Using your legs to lift, rather than your back
- Keeping the frame as close to your body as possible to minimize strain
- Having a second person assist you, if necessary, to ensure a safe and controlled lift
Inspect the Roof for Damage
The roof's condition is crucial to inspect when removing a roof top tent, as any damage can compromise its structural integrity or lead to costly repairs.
Perform a thorough damage assessment by visually inspecting the roof for signs of wear, such as scratches, dents, or roof rust.
Check the areas where the tent's mounts and brackets were attached, as these are common spots for damage.
Look for any signs of rust or corrosion, which can weaken the roof's structure.
Check the roof's paint and clear coat for any damage or discoloration, as this can indicate underlying issues.
Inspect the sealants and gaskets for any signs of damage or deterioration, which can lead to leaks or water damage.
Document any damage you find to reference later.
If you notice any significant damage, consider consulting a professional mechanic or auto body specialist to assess the extent of the damage and recommend repairs.
Take note of any areas that require attention before reinstalling a roof top tent or other equipment to prevent further damage.
Store the Tent Properly
To store your roof top tent properly, choose a secure location that protects it from the elements and potential damage.
Ensure the area is dry, well-ventilated, and out of direct sunlight to prevent fabric degradation. This will also help you maintain the tent's condition and extend its lifespan.
Secure Storage Location
Storing your roof top tent properly requires careful consideration of its environment to prevent damage and maintain its condition.
You'll need to choose a secure storage location that shields your tent from potential threats.
When evaluating storage options, consider the following factors:
- Avoid areas with high humidity or exposure to water to prevent mold and mildew growth.
- Keep your tent away from direct sunlight, which can cause fabric degradation and fading.
- Select a storage location with stable temperatures between 60°F and 80°F (15°C and 27°C) to prevent material damage.
- Opt for a storage location with limited access to prevent theft and tampering.
Choose a secure storage location that meets these criteria, such as a dry garage or a climate-controlled storage unit.
Ensure the area is well-ventilated and free from pests.
Consider using storage racks or shelves to keep your tent off the floor and protect it from potential damage.
Protect Tent Fabric
With your secure storage location chosen, now it's time to focus on protecting the tent fabric. This step is crucial to extend the lifespan of your roof top tent. Begin by inspecting the fabric for any signs of damage or wear. Check for tears, cuts, or abrasions that may have occurred during installation or removal.
| Storage Location | UV Protection | Moisture Levels |
|---|---|---|
| Dry, well-ventilated area | Use a UV-resistant cover or bag | Low to moderate |
| Shaded area | Apply a UV-protective coating to the fabric | Moderate to high |
| Indoor storage room | Store the tent in its original bag or case | Low |
| Outdoor storage shed | Use a waterproof and UV-resistant cover | Moderate to high |
When storing your roof top tent, ensure it's clean and dry to prevent mold and mildew growth. Use a fabric inspection checklist to identify any areas that require repair or maintenance. Apply a UV-protective coating or use a UV-resistant cover to shield the fabric from the sun's damaging rays. Proper storage and maintenance will help extend the lifespan of your roof top tent and keep it in good condition for future use.
Frequently Asked Questions
Can I Remove a Rooftop Tent Alone?
Removing a rooftop tent solo can be a struggle, but it's doable with the right tools and preparation. You'll need to assess the tent's weight, size, and your car's accessibility to ensure a safe, lonely removal process.
Do Rooftop Tents Void Car Warranties?
Don't let warranty woes weigh on your mind like an anchor. You're likely wondering if rooftop tents void car warranties. Check your vehicle's manufacturer policies, as warranty concerns vary – some may cover damage, others won't.
What if My Tent Is Stuck Due to Rust?
If your rooftop tent is stuck due to rust, you'll need to apply rust removal techniques like wire brushing or chemical treatments. Regularly applying rust prevention methods, such as lubricants or wax, can prevent this issue.
How Long Does It Take to Remove a Rooftop Tent?
Like a bird breaking free from its cage, you'll shatter time constraints when you master rooftop tent removal. Solo removal can take 30-60 minutes, depending on your familiarity with the process and equipment.
Can I Reuse Old Mounting Brackets on a New Car?
You'll need to verify bracket compatibility before reusing old mounting brackets on a new car. Check the manufacturer's specifications or consider mounting alternatives if the brackets won't fit or aren't compatible.
Conclusion
Freeing your car from the weight of a roof top tent is a liberating experience, but it's also a chance to inspect the damage that time and travel can inflict. As you carefully lift the tent off, the contrast between the wear and tear on the roof rack and the tent's sturdy design is a reminder that with great adventure comes great responsibility – to maintain, to inspect, and to preserve the gear that makes it all possible.